The following article shows you how users can grant other users access to other entries via the Password Depot Client and also seal them. This right is available to you both on the database level and for individual entries and folders within a database.
If the administrator allows a user to grant access to other users, they can share data with other server users via the client without the server administrator having to change the rights management each time. This is useful, for example, if a user needs or wants to grant another user temporary access to one of their entries.
Grant access rights in the Password Depot Enterprise Server
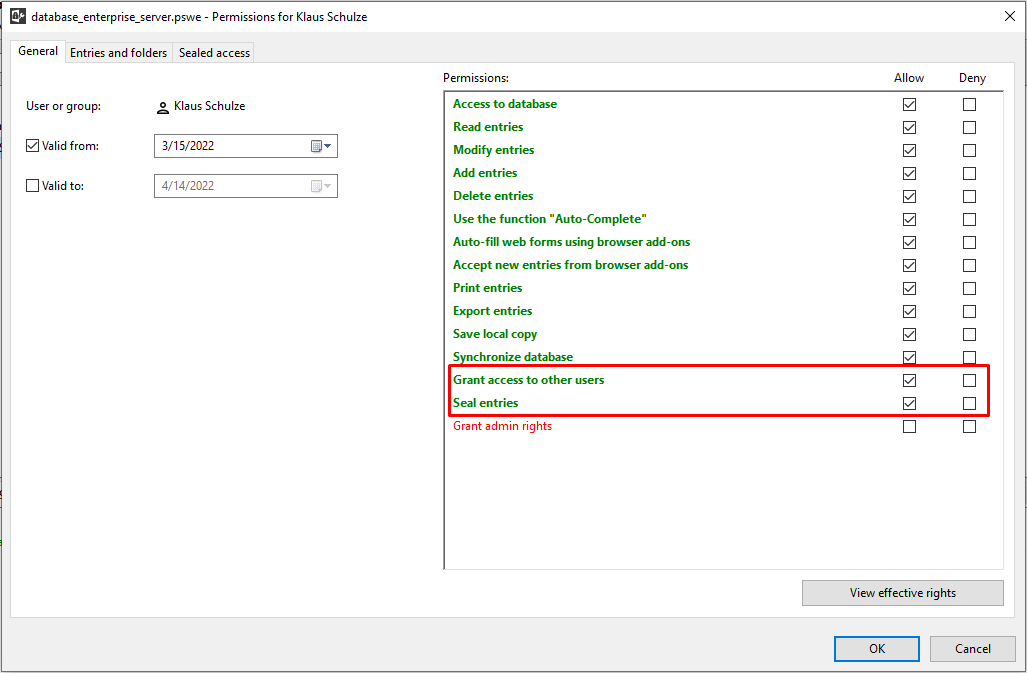
Using the server manager, the super administrator or another server administrator first determines for each user or group whether the rights "Grant access rights" and / or "Seal entries" should be granted. Like all other rights, they can be set individually.
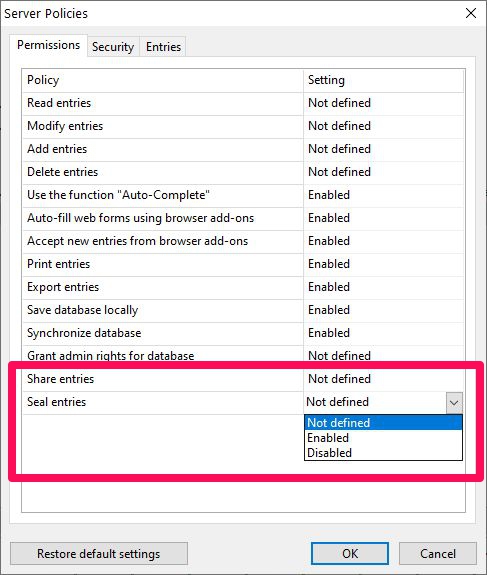
These new rights can also be found in the server policies so that they can be defined under Manage > Server policies for the entire server:
Tip: Please make sure to set the permissions Read/Modify/Add/Delete entries to Not defined (as shown in the above screenshot) in order to use the share and seal entries feature correctly.
Sealing is a right that a user must first be granted by the administrator in the Password Depot server manager. If access to an entry in the database has been granted by user A to user B and the entry has been sealed, it is first necessary that a user with admin rights on the Enterprise Server allows access to the selected entry so that access can then also take place. Only users with admin rights in the Server Manager can grant access to a sealed entry. The user who grants access determines which user on the server requires approval.
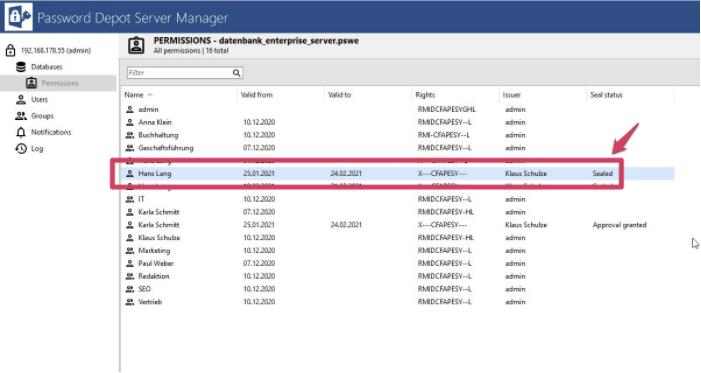
To do this, the relevant user logs on to the Enterprise Server with their access data. In the Databases > Permissions area, you can now see that user B has been granted access to an entry in the selected database. The specified period of access, the creator of the access and whether the entry has been sealed is displayed. The authorizations can be opened by double-clicking. The approval is given in the "Sealed access" tab.
The status of the entry can be seen here, which is set to "Sealed", for example, if the corresponding entry has been sealed. The corresponding status can be changed via "Change seal status".
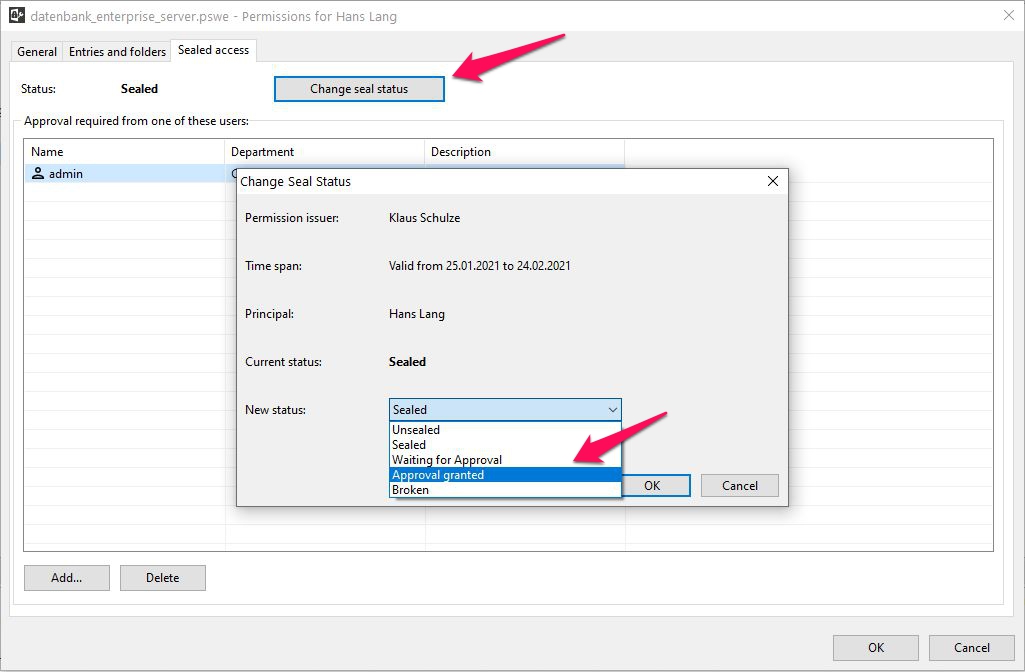
The following options are available as status:
- Sealed: An entry is still sealed and no attempt has been made to access the corresponding entry.
- Unsealed: The seal for an entry has been unsealed.
- Waiting for Approval: The user who has been granted access specifically asks for access approval. In this case, they have already wanted to open the corresponding entry and are now asking for permission to open the entry.
- Approval granted: An authorized person has given approval for access accordingly.
- Broken: A seal was broken and an entry was accessed.
After the status has been changed, the new status can be viewed in the database authorizations. If approval has been granted, the user who has been granted access can now open the entry and break the seal.
Authorized persons also have the option of changing the status of the seal for an entry at any time. Server administrators can also add other authorized persons who are then also authorized to change the status of the seal. This is done in the "Sealed Access" tab using the "Add" button.

Example: User A grants user B access to an entry within the database for a total of two weeks and seals this entry. Once approved, user B can break the seal and access the entry. If necessary, a server administrator can change the status of the seal again; for example, they can reseal the entry so that user B has to ask for approval again if they want to access the corresponding entry, etc.
Split and seal with the Password Depot Client
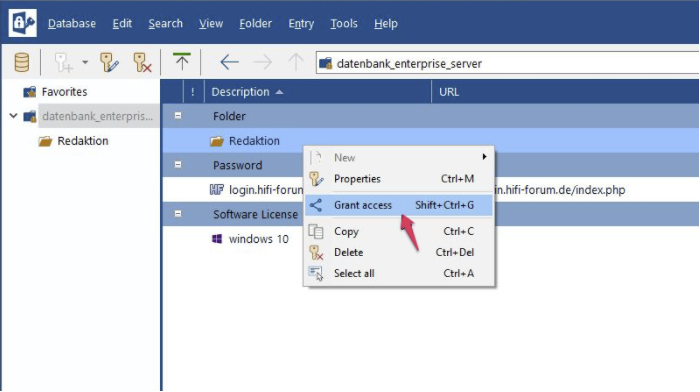
The actual process of sharing and sealing then takes place via the client and is only available here to users who have this right in the server manager. If a user wants to share an entry within the database with another user, they select the particular entry and right-click it. Here, they must then click on "Grant access".
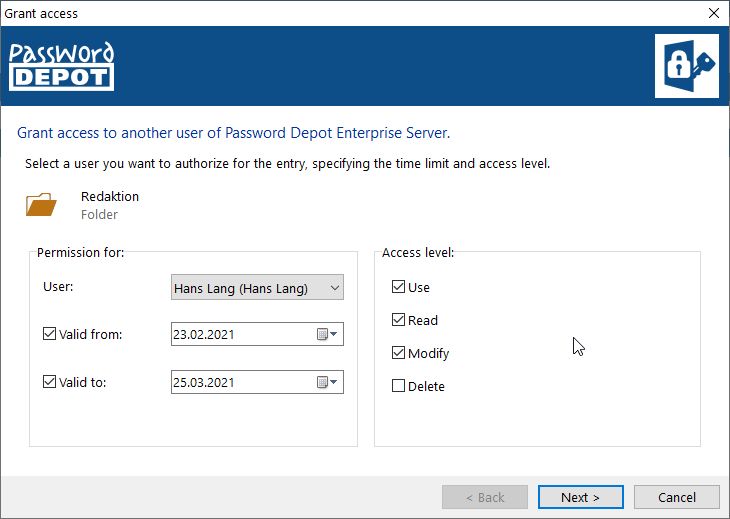
He then selects the user and can determine the period of validity and the access level.
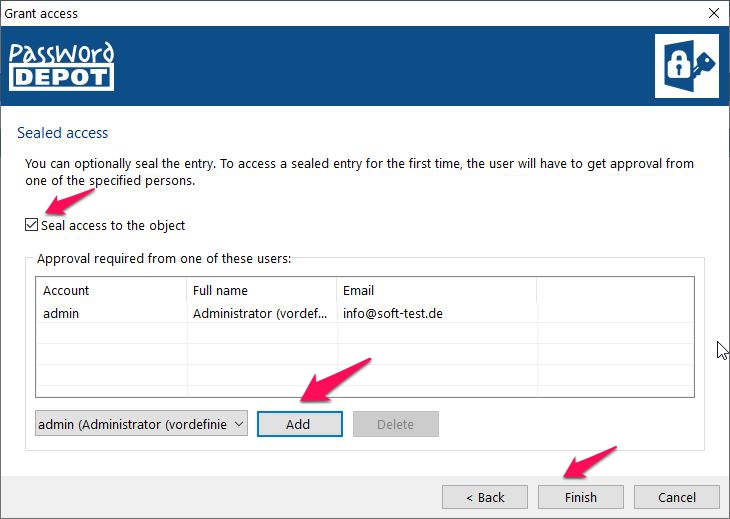
If a user is granted access to an entry, the entry that is to be shared can also be sealed. Now select the authorized person who should give the approval, click on "Add" and then on "Finish"!
Comments
Please sign in to leave a comment.